Friday, 31 October 2014

Microsoft Band (day 2: pairing)

Sadly, day 2 of my Band experience was not as much fun as day 1.

As I was excitedly demonstrating how notifications from my phone appeared on the Band... they stopped appearing :-( I didn't think to try and debug the issue right away, so I just kept the Band on collecting data.

Next morning when I went to view my sleep data on my iPhone (more on that in future), the Band wouldn't sync data at all! Just this message:
Band error - I can't find your Band. Please make sure it is nearby and paired or go to My Microsoft Band to register a different one.

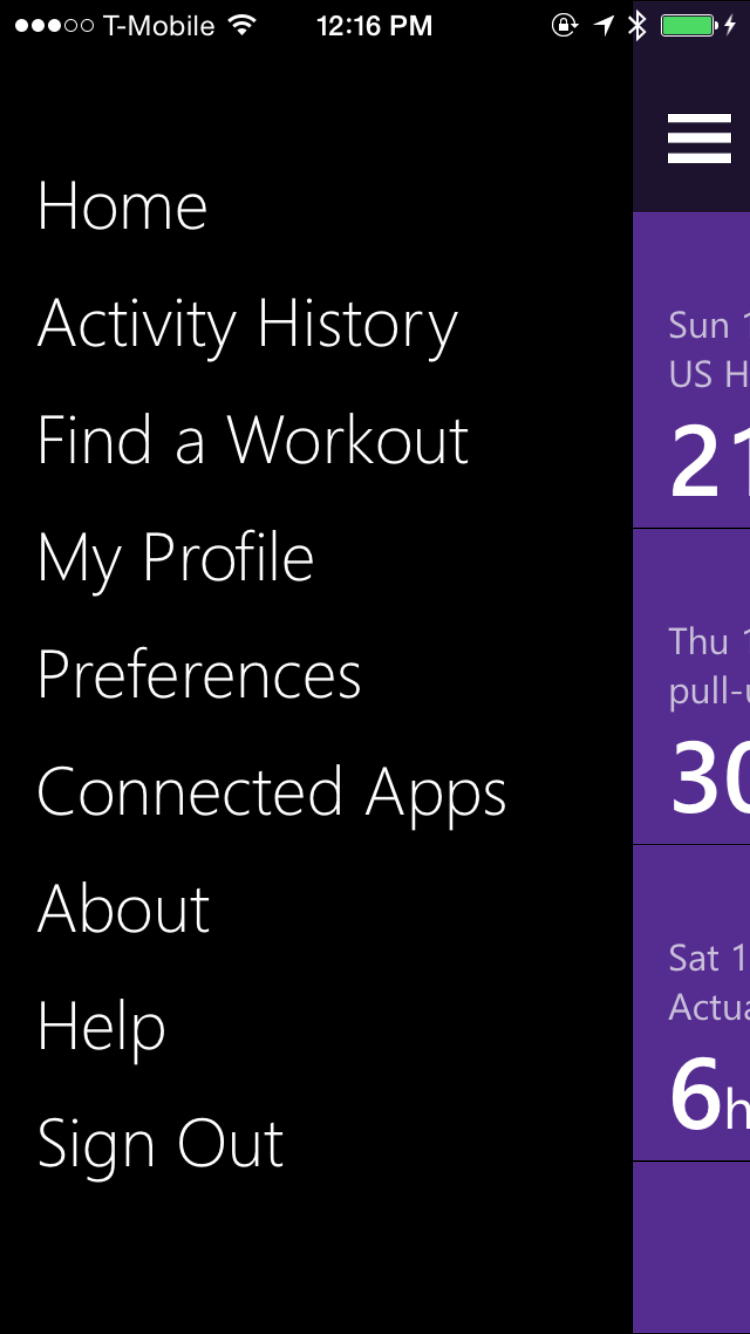
I was immediately pretty concerned! I looked through the menus on the Band but did not find anything helpful. I checked the pairing and it seemed to be paired fine (although I discovered later it wasn't), so I went to My Microsoft Band as they suggested.

ARGH! Now it sounds like I am going to lose data :-(
Unregister Band? Default tile and notification settings will be erased and you will need to factory reset your Microsoft Band.

I panicked some more, and tried the Help feature in the app... OMG Microsoft WTF. Microsoft Health's in-app Help (on a mobile device!) just goes to the Support Home Page on the web (where, by the way, it's impossible to find anything related to Band).

Worst. User. Experience. Ever.


Finally after much screwing around with various settings, it appears that you need to be paired to TWO "bluetooth devices" for a Band... one with an "LE" suffix and one without (as shown). This is about 30 minutes of various rebooting and re-pairing attempts.


I have no idea what caused the pairing to fail in the first place, it just seemed to step receiving notifications at some point, and then not be able to connect at all.

Anyway... my Band is back online and all my data appears to be intact. It was not my ideal second-day experience, however; and at this point I'm a little less like to shift to this as my primary running device if the data is potentially lost so easily.

I like everything else about it so far though, so I'll keep playing!

Thursday, 30 October 2014

Microsoft Band (day 1)

I had no clue Microsoft was working on the Band until the reviews starting to leak out last night, but I was immediately keen to try one out. Today I dropped by the Microsoft Store at opening to pick one up, and I'm happy to report it's actually a pretty cool piece of tech.

Let me start by saying two things: (1) I really wanted to like the Band ~ smart watches don't really appeal to me but this feels smaller, less obvious and more focused that the Apple and Android devices (2) my primary use-case is running - with GPS and heart rate recording - so that is my measure of the device's success.

TL;DR I like the device a lot, my initial impression is that it does what I want while running and it pleasantly surprised me in a lot of other ways as well.


Features

The initial setup was painless: I downloaded the Microsoft Health app to my iPhone, paired the Band and was immediately able to receive alerts (texts, voicemail alerts, etc) on the Band. The app was easy enough to figure out: I changed the color scheme and turned on Facebook, Twitter, Notifications... and everything just worked.

Using the Band's menu on the phone screen is surprisingly smooth - although I'm not sure how people will bigger hands will find it. The device itself is less bulky than I expected (especially on my small wrist)... don't get me wrong it still feels "big" and looks a little "wide", but it's not heavy and after I'd worn it for a while I barely noticed it.

Playing around with heart-rate monitoring, calendar, notifications, alarms, the step counter, the UV detector and the workouts feature was a lot of fun; but as I said my primary concern was using it for run training...

Running

I was easily able to figure out how to get everything working, but here is the running "support page" for reference. To be clear - you do NOT need your phone with you while running! The GPS functionality is built-in to the Band, along with the step-counter and heart-rate monitor, so you get plenty of good data while exercising without dragging a phone around :)

To compare the accuracy and usability of the Band I wore my Garmin Forerunner 10 for comparison. They both took a while to 'find satellites' (and it always feels like forever when you want to start running), but the Band was actually ready slightly ahead of the Garmin.

During the run, they both kept in pretty close sync, beeping out kilometer markers at roughly the same time (and therefore showing similar splits). There was a bit of drift between them but nothing dramatic. The screen of the Band was constantly lit (which was great, as I was running at night), and the elapsed time is pretty easy to read. The heart-rate text is pretty small to read while you're moving unfortunately.

Your pace is available by 'swiping down' on the screen while you're running. It auto-hides after a while, returning the display to the elapsed time and heart-rate. I haven't got pictures of these screens and haven't found them on the support site yet. At each kilometer marker (or mile if you must) it beeps and shows your pace-per-kilometer/mile for a few seconds, before again reverting to the elapsed time display.

After the run was over, I uploaded my Garmin data to Strava (as I normally do) so I could compare the results. The Band seamlessly sync'd its data to my phone as soon as I opened the Microsoft Health app.

Summary Data

Here's the summary info from the Microsoft Health app versus Strava's view of my Garmin-collected data. Both compare pretty well - the Calories calculations are fairly different (something to investigate further) but the distance and pace are pretty close. The best thing about the Band is the inclusion of heart-rate info, without the hassle of a chest-strap or other additional device.


The Band also has an interesting 'Recovery' estimate (not shown) which I'm still to learn more about.

Map

Here's the two maps (Band/Health app vs Garmin/Strava). The Band does cute color-coding of pace, I'm not sure whether Strava can do that with more information (it does not have any heart rate data available as the Garmin Forerunner 10 does not support that). The Band track seems a little more accurate, but with a sample size of one it's a little early to draw conclusions about that.


I'm not sure what to make of the Band coloring a 4'20" kilometer as "snails pace" (jk :-)

Splits

Both provide similar splits data, although the data varies slightly (due to GPS variance).


Graphs

The Microsoft Health app shows pace, heart-rate and elevation. Strava doesn't get heart-rate data but graphs the other two (note the Garmin's GPS error causing a pace calculation error in the Strava graph around the 2km mark).


Navigating around the map, splits and graphs is fairly easy once you figure it out. Just tap and swipe around until you get the hang of it.

Conclusion

After less than a day it's probably a bit early to draw conclusions, but I overall I had a lot of fun playing with the Band today. Can't wait to race with it and check the data against the watch (and to see heart-rate info for the first time in ages). Here's hoping the number of app integrations increase and they eventually work out sync'ing with Strava!

Tuesday, 30 September 2014

iPhone 6 and 6 Plus LaunchScreen.storyboard for Xamarin

Following on from the previous post about adding launch images for iPhone 6 and 6 Plus, here are the instructions for adding a LaunchScreen.storyboard file instead of multiple fixed-size images. Apple's documentation recommends this method over using the static images. I used these instructions for replacing launch images with storyboards as a reference.

Configuring a LaunchScreen like this will automatically scale up your app for iPhone 6 and iPhone 6 Plus devices. You might also want to consider adding @3x retina images for iPhone 6 Plus support.

1. Add a new Storyboard to your project and call it LaunchScreen.storyboard.

2. Drag a UIViewController in and design your launch screen. I chose a black background with some white centered text - it looks like this (use the VIEW AS option to preview in different sizes):
3. Open the iPhone application Project Options and scroll down to the iPhone Launch Images section. There is a new Launch Screen dropdown (currently in Beta) that will automatically be populated with the available storyboards and xibs in your project. Choose the storyboard you just added.
3a. This creates the following key in your Info.plist (just FYI):
 <key>UILaunchStoryboardName</key>
 <string>LaunchScreen</string>

4. When you build the app, appropriate launch images will be generated for your app. Here's a shot of the emulator starting up showing the launch image for iPhone 6:

I've updated my Xamarin.Forms Todo sample, the code and storyboard are available on github.

UPDATE: Gerry reminded me about Marco's experience where adding a LaunchImage.storyboard file causes iOS to ignore the UIDeviceFamily setting in Info.plist (which specifies iPhone/iPod, iPad, or Universal app) and upscale iPhone-only apps to full iPad screen size (potentially making your app look really weird!). This behavior still appears to occur on the simulator, so test before you launch :)


Monday, 22 September 2014

iPhone 6 and 6 Plus Launch Images for Xamarin

I was initially stumped by how to get my Xamarin.iOS and Xamarin.Forms apps to size correctly on the iPhone 6 and iPhone 6 Plus. Thanks to this StackOverflow question & answer I have a solution - reposting here because the solution that works best for me right now is only the 3rd most popular answer there.

Simply create two new default images (this is for portrait only, but landscape will become obvious later):

Default-667h@2x.png for iPhone 6; dimensions 750x1334

Default-736h@3x.png for iPhone 6 Plus; dimensions 1242x2208

and place them in the application root or the Resources folder. Notice the filename format is similar to the Default-568h@2x.png image that Apple introduced for the iPhone 5 screen.

Now edit the source of your Info.plist file (open in a text editor so you can type XML directly) and add the following UILaunchImages key (the first two items are for iPhone 6, the others are for the older default image configuration):

<key>UILaunchImages</key>
<array>
<dict>
<key>UILaunchImageMinimumOSVersion</key>
<string>8.0</string>
<key>UILaunchImageName</key>
<string>Default-667h</string>
<key>UILaunchImageOrientation</key>
<string>Portrait</string>
<key>UILaunchImageSize</key>
<string>{375, 667}</string>
</dict>
<dict>
<key>UILaunchImageMinimumOSVersion</key>
<string>8.0</string>
<key>UILaunchImageName</key>
<string>Default-736h</string>
<key>UILaunchImageOrientation</key>
<string>Portrait</string>
<key>UILaunchImageSize</key>
<string>{414, 736}</string>
</dict>
<dict>
<key>UILaunchImageMinimumOSVersion</key>
<string>7.0</string>
<key>UILaunchImageName</key>
<string>Default-568h</string>
<key>UILaunchImageOrientation</key>
<string>Portrait</string>
<key>UILaunchImageSize</key>
<string>{320, 568}</string>
</dict>
 <dict>
  <key>UILaunchImageMinimumOSVersion</key>
  <string>6.0</string>
  <key>UILaunchImageName</key>
  <string>Default</string>
  <key>UILaunchImageOrientation</key>
  <string>Portrait</string>
  <key>UILaunchImageSize</key>
  <string>{320, 480}</string>

 </dict>
</array>
If you wish to support landscape images, add matching keys with Default-Landscape-???h filenames and specify the correct orientation and size.

Note that this is not Apple's preferred way of indicating support for the screen sizes. Their Launch Images doc says:

You use a launch XIB or storyboard file to indicate that your app runs on iPhone 6 Plus or iPhone 6.

which requires you to create a Storyboard or XIB using size classes. More on how to do that in this post, or head back to that StackOverflow post!

p.s. this iPhone 6 Screens Demystified post by PaintCode is awesome!

UPDATED: @jamesmontemagno informs me that you need to add the original 320x480 into the plist too, so I've added to the example above. 

Sunday, 29 September 2013

Android TextToSpeech API with Xamarin: it talks too!

A recent post covered Apple's new text-to-speech API in iOS 7, but forgot to mention that Android has actually had this capability for a while! It's really easy to add text-to-speech to a Xamarin.Android app: just implement TextToSpeech.IOnInitListener (which is a single method: OnInit) then create a new TextToSpeech instance:

speaker = new TextToSpeech (this, this);

and call Speak:

void Speak(string text) {
   var p = new Dictionary ();
   speaker.Speak (text, QueueMode.Flush, p);
}

The TaskyPro sample code has been updated so that both the iOS and Android apps have a Speak button. The Android app looks like this:

Check out this cool TtsSetup sample for Xamarin (via StackOverflow) for more details on how to customize the Android TextToSpeech API.

Friday, 27 September 2013

Built-in Barcode Scanning with iOS7 and Xamarin: MonkeyScan!

Another new iOS 7 feature is built-in support for barcode-scanning via the AVFoundation AVCaptureDevice API. Back in 2012 I threw together MonkeyScan using Windows Azure Services and the ZXing barcode scanning library. For iOS 7 I've updated the code to use the Azure Mobile Services Component and the new iOS 7 barcode scanning API instead.

The app looks like this when scanning a PassKit pass:

The code that sets up an AVCaptureDevice for 'metadata capture' (as opposed to capturing an image or video, I guess :) is shown below:

bool SetupCaptureSession () {
   session = new AVCaptureSession();
   AVCaptureDevice device = 
      AVCaptureDevice.DefaultDeviceWithMediaType(AVMediaType.Video);
   NSError error = null;
   AVCaptureDeviceInput input = 
      AVCaptureDeviceInput.FromDevice(device, out error);

   if (input == null)
      Console.WriteLine("Error: " + error); 
   else
      session.AddInput(input);

   AVCaptureMetadataOutput output = new AVCaptureMetadataOutput();
   var dg = new CaptureDelegate(this);
   output.SetDelegate(dg, MonoTouch.CoreFoundation.DispatchQueue.MainQueue);
   session.AddOutput(output); // MUST add output before setting metadata types!

   output.MetadataObjectTypes = new NSString[] 
      {AVMetadataObject.TypeQRCode, AVMetadataObject.TypeAztecCode};

   AVCaptureVideoPreviewLayer previewLayer = new AVCaptureVideoPreviewLayer(session);
   previewLayer.Frame = new RectangleF(0, 0, 320, 290);
   previewLayer.VideoGravity = AVLayerVideoGravity.ResizeAspectFill.ToString();
   View.Layer.AddSublayer (previewLayer);

   session.StartRunning();
   return true;
}

You can specify specific barcodes to recognize or use output.AvailableMetadataObjectTypes to process all supported types.

...and it speaks!
Since the app now requires iOS 7, it can also use the new AVSpeechSynthesizer to speak the scan result as well (see previous post).

if (valid && !reentry) {
   View.BackgroundColor = UIColor.Green;
   Speak ("Please enter");
} else if (valid && reentry) {
   View.BackgroundColor = UIColor.Orange;
   Speak ("Welcome back");
} else {
   View.BackgroundColor = UIColor.Red;
   Speak ("Denied!");
}

The MonkeyScan github repo has been updated with this code.

Thursday, 26 September 2013

iOS SpeechSynthesizer API with Xamarin: it talks!

Mike posted a neat code example today on adding the new iOS 7 AVSpeechSynthensizer API to a Xamarin app.

It's so easy, I added speech synthesis to the this TaskBoard to-do list example in about 5 lines of code. Now the app can read the to-do item back to you :) just by adding this code:

if (UIDevice.CurrentDevice.CheckSystemVersion (7, 0)) {
   SpeakButton.TouchUpInside += (sender, e) => {    // requires iOS 7
      Speak (TitleText.Text + ". " + NotesText.Text);
   };
}

and

void Speak (string text) {
   var speechSynthesizer = new AVSpeechSynthesizer ();

   var speechUtterance = new AVSpeechUtterance (text) {
      Rate = AVSpeechUtterance.MaximumSpeechRate/4,
      Voice = AVSpeechSynthesisVoice.FromLanguage ("en-AU"),
      Volume = 0.5f,
      PitchMultiplier = 1.0f
   };

   speechSynthesizer.SpeakUtterance (speechUtterance);
}

The UI now looks like this: touch the Speak button to hear the text read back to you.

Wednesday, 10 July 2013

New Dropbox API one day, on Xamarin the next

Long-time Xamarin customers know that there is a history of delivering updates same day when the native platforms (iOS and Android, for example) are upgraded. Today there was another little surprise - the new Dropbox Datastore API that was announced at DBX yesterday was made available via a Xamarin Component today!

Think of it as a cross-platform iCloud-like key-value store ~ same kind of stuff you can do with Parse or even Azure Mobile Services.

Check out the Xamarin Blog for all the details and a cute sample app called MonkeyBox.

But wait, there's more!
In the past I've posted about porting a small "To Do List" application to various different platforms, including Azure (iOS, Android, Mac and more) twice as well as an iCloud version for iOS.

Here's the same basic code using the new Dropbox Datastore API (just iOS, for now...):

Here's a direct link to the code on github... to use just download the solution (which includes the Xamarin Dropbox Component) and:

  1. Visit the Dropbox App Console to get your access credentials set-up.
  2. Add the App key and App secret to the AppDelegate.cs in the project.
  3. Add a Custom URL Type to the advanced Info.plist settings (replacing the identifier and also YOUR_APP_KEY with the correct credential value) like this

When the app is up-and-running, you can 'browse datastores' from the Dropbox App Console and see the data update on the server in real-time!

In only a few lines of code you can use a cloud-based data store simply and easily, across multiple platforms and devices! Load up the app on a couple of iOS devices (and/or the iOS Simulator) and watch the magic in action :)

Tuesday, 15 January 2013

Xamarin for Java Developers

Last night I was given the opportunity to present Xamarin's Mono for Android to the East Bay Google Developer Group. It was a lot of fun, with plenty of the audience asking a lot of great questions and generally being curious about how C# can be used to build Android apps. Here are the slides from the talk - please drop me a line with any feedback or questions!

One topical question was "what does using Xamarin and C# offer existing Android Java developers?". I have a couple of thoughts which are listed below (in no particular order):

Learn a new language!
The days of specializing in a single language throughout your career (or even throughout the year!) are over. Once upon a time it was COBOL all the way down, and you could argue that it's still enough to just know C/C++. But it's no longer the norm ~ developers want to grow and learn, and use the best tool for the job (whether it's Perl, PHP, Java, Ruby, C#, F#, Javascript, TypeScript, Go, or whatever).

It can be daunting though, to start from scratch and learn a new IDE, framework and syntax - which is why I think C# is a great progression for Java devs. The two languages are obviously related - there is a lot of common syntax and equivalent keywords that make it easy to get proficient quickly. They're both strongly typed, so the IDE and compiler can really help you learn. Then once you know the C# basics, a whole world of new APIs open up to you: LINQ, the .NET framework's serialization and web service features, Parallel Task Library and async support, reactive extensions, and more.

It also introduces you to another IDE (Visual Studio is a great tool, as is Xamarin's free MonoDevelop IDE), which in turn can encourage you to further explore other languages and platforms (suddenly it's a small leap to work on Windows Phone, or try F#). Using the free trial you can easily get productive in C# and Android development without any up-front cost: you can run your apps on the Android emulator, and choose to work on either Windows or Mac with MonoDevelop.

Cross-platform development!
There are a lot of Java developers who are already proficient with the Android SDK and have published successful apps to Google Play, or Amazon, or Samsung app stores; and there's another group of corporate/enterprise developers building apps for internal/extranet use that were designed for Android. When these developers ask "why Xamarin?", I never say "throw away everything you've done and re-write in C#!" -- that'd be crazy ;-)

But what happens when you want to take these apps cross-platform, either to make more money on the iOS and Mac App Stores or to better support a corporate BYOD policy which means your internal apps need to run on iOS and Windows? You can choose to learn Objective-C to write for iOS and C# for Windows... or take the opportunity provided by Xamarin to use C# for all the non-Java platforms and reduce the amount of code you have to support and re-write by half!

Following on from the first point, I think learning C# is a much smaller leap for a Java developer than Objective-C; and once you've done so you can work on either iOS apps using Xamarin's MonoTouch or Windows Phone, Windows 8 and Windows RT tablet apps! You might like C# so much that you do go back and re-write your Java, or at least start building a hybrid that shares some Java and C# code...

Xamarin does Android well too :)
If Java developers do fall in love with C# then they also find that Xamarin does Android just as well as anyone (probably better!). Our MonoDevelop IDE (and our integration with Visual Studio) means you get an awesome coding experience (autocomplete/intellisense/code completion, debugging, refactoring, source control integration, etc) as well as a drag-and-drop UI designer. You be the judge of whether it's a better experience than Eclipse :)

Fin
In summary, why not? As a Java developer you have a lot to gain and nothing to lose by giving C# a try. A whole world of new platforms, tools and frameworks become available with a very low barrier to entry. Try it - you just might like it ;-)

Thursday, 3 January 2013

Localizing iOS6 Storyboards with MonoTouch

Localization and internationalization of XIB and Storyboard files has historically been a very manual process. Typically these file types would be duplicated in each 'language directory' (*.lproj) and then the text and layout tweaked independently by each translator. Changes to the actual Storyboard or XIBs would need to be manually propagated across all the 'language copies'.

In iOS6 Apple introduced a new concept - Base Localization - which you can read about in their documentation on Internationalizing Your App. Your project can contain a 'special' Base.lproj directory where the Storyboard files are located, and then a corresponding *.strings file (whose filename matches the Storyboard's) in each language directory with the translations.

There is a small sample showing how this works with MonoTouch - TaskyL10nStoryboard on github. There is no IDE support currently, but you can easily create the Base.lproj directory manually in MonoDevelop and everything works as expected. Here's a screenshot of the project structure:

then inside the Storyboard itself you need to identify the controls you wish to localize. Click on a control to discover its Object ID, and shown in this screenshot:

Using the Object IDs from the Storyboard file, we can translate the display values for various properties (including text, placeholders and others) in the MainStoryboard.strings file in each language directory, like this:
"SXg-TT-IwM.placeholder" = "nombre de la tarea";
"Pqa-aa-ury.placeholder"= "otra información de tarea";
"zwR-D9-hM1.text" = "Detalles de la tarea";
"bAM-2j-Rzw.text" = "Notas";
"NF3-h8-xmR.text" = "Completo";
"MWt-Ya-pMf.normalTitle" = "Guardar";
"IGr-pR-05L.normalTitle" = "Eliminar";
Using the Object ID and property as the localization key is quite different to Apple's previous guidance on localization, where the key is typically the base-language's actual displayable value.

Here's the localized Storyboard, in Japanese:


What about layout?
Strings can often be very different lengths in different languages. When you used a different Storyboard or XIB for each language then the control sizes could be manually adjusted to fit. When using Base Localization you should use Apple's new constraint-based layout to handle these size differences.

What about iOS5 and earlier?
This method only works on iOS6. To localize text on earlier versions of iOS you will have to duplicate your Storyboards and XIBs for each language, or create outlets for all the controls and set their localized text values in code using NSBundle.MainBundle.LocalizedString().
There is another localized sample - TaskyL10n - which shows how to localize text elements directly and uses MonoTouch.Dialog.

Sunday, 23 September 2012

iOS 6 UIRefreshControl with MonoTouch

Another cute little new feature of iOS 6 is the built-in pull-to-refresh control - UIRefreshControl. It is really simple to wire up with Xamarin on a regular UITableViewController or with MonoTouch.Dialog.

In case you're unfamiliar with it, this is how the new control looks:

To implement:

  • Assign the RefreshControl property of a UITableViewController to a new instance of the control, eg. RefreshControl = new UIRefreshControl();
  • Create a handler for the control's ValueChanged event, eg RefreshControl.ValueChanged += HandleValueChanged;. In this handler your code will do whatever is required to refresh the data when the user pulls down enough to trigger the event.
  • In HandleValueChanged code, once you have refreshed the table, call the EndRefreshing method of the control to stop it spinning. Your refresh code was probably not running on the main thread, in which case you'll probably want to use InvokeOnMainThread like this: InvokeOnMainThread (() => {RefreshControl.EndRefreshing (); });

There are additional features you may use:

  • BeginRefreshing - call this method from your code if you start a refresh operation from code (eg. on a timer or in response to some other event). This sets the UI of the control to indicate there is already a refresh in progress.
  • Refreshing - whether there is already a refresh in progress.
  • AttributedTitle - optional text that appears under the refresh control.
  • TintColor - customize the appearance of the control to match your application's theme.

Refer to Apple's UIRefreshControl doc for additional info.

UPDATE: What about iOS 5?

This above example will not work on earlier versions of iOS - the UIRefreshControl class does not exist, nor does the RefreshControl property on UITableViewController. To get around this problem, the following code does a system check and falls back to an old-fashioned navbarbutton in earlier versions of iOS:

if (UIDevice.CurrentDevice.CheckSystemVersion (6,0)) {
    // UIRefreshControl iOS6
    RefreshControl = new UIRefreshControl();
    RefreshControl.ValueChanged += (sender, e) => { Refresh(); };
} else {
    // old style refresh button
    NavigationItem.SetRightBarButtonItem (new UIBarButtonItem (UIBarButtonSystemItem.Refresh), false);
    NavigationItem.RightBarButtonItem.Clicked += (sender, e) => { Refresh(); };
}

The Refresh method should contain the code that actually gets new data and updates the UITableView. That method should contain a similar if (CheckSystemVersion(6,0)) clause that wraps the call to the RefreshControl.EndRefreshing method on the main thread. Users on older operating systems will see this:

Wednesday, 19 September 2012

iOS 6 released, supported by Xamarin

It would be hard to miss the news that Apple is launching their new iPhone 5 this week, and has also released the final version of iOS 6. What's also great is that Xamarin supports iOS 6 too, on release day! There's already plenty of documentation, using C# with StoreKit, PassKit, EventKit, UIKit changes and more.

Of course there are heaps of little additions as well as those big ones, including a raft of new Core Image Filters to play with. For those working on the next Instagram (isn't everyone ;-), here's a preview of a couple of them:


(Posterize, Bloom, Invert, Perspective and Vortex)

For more information, review the Introduction to CoreImage in iOS 5 and the additional sample code for iOS 6. You might also like Apple's CoreImage Filter Reference.

Thursday, 13 September 2012

Microsoft's Azure Mobile Services... and WP7... and Mac

So far, Azure Mobile Services have been added to MonoTouch and Mono for Android (as well as Microsoft's getting started sample for Windows 8).
To complete the 'set', I ported the MonoTouch code to MacOSX using the free, open-source MonoMac AND used @kenegozi's 'unofficial' client to munge Azure Mobile Services into our existing Tasky sample on WP7.

These aren't production-quality implementations, mind you, just a couple of quick hacks to illustrate the beauty and simplicity of having C# and the .NET framework available across all these platforms. Oh, and also show the beauty of Azure Mobile Services :-)
You can grab the code for all of these from TaskCloud/Azure on github. You'll need to sign up for the Azure trial and follow the instructions to set up the Todo list tutorial.
Screenshots
Here's how the WP7 and MonoMac versions look:

Saturday, 1 September 2012

Microsoft's Azure Mobile Services... and Mono-for-Android

Yesterday's post introduced a quick implementation of Microsoft's Azure Mobile Services using MonoTouch to build an iOS app.
The WebClient and Json handling was easily refactored into a single class - AzureWebService - which was then added to the existing Android version of the Tasky sample... and now we have the same Azure Mobile Service being access by three platform clients: Windows 8, iOS and Android all with C# (and the iOS and Android apps sharing the service client code).

Additional features have also been added to AzureWebService to allow deletion of tasks. The Android app source is on github and it looks like this (delete has been added to the iOS app too):

Here is a discussion of how the API was reverse-engineered with Fiddler. The REST endpoints that TaskyAzure accesses are:

GET /tables/TodoItem

GET /tables/TodoItem/?$filter=(id%20eq%20{0})

PATCH /tables/TodoItem/{id}
{"id":1,"text":"updated task text","complete":false}

POST /tables/TodoItem
{"text":"new task text","complete":false}

DELETE /tables/TodoItem/{id}

Finally, only a few small updates were required in the Windows 8 example prevent the completed tasks from disappearing and instead make use of the checkbox in a more natural way:

Now all three apps are reading and writing to the same Azure data store! Can't wait for the official cross-platform APIs :-)

Friday, 31 August 2012

Microsoft's Azure Mobile Services... and MonoTouch

Microsoft only recently announced a cool new addition to the Azure product offering: Mobile Services. They have done a great job at providing a getting started tutorial that gives you a working Windows 8 app in about 5 minutes (seriously, it's fast and easy).

Azure Mobile Services consist of an underlying REST API, so it didn't take long for someone (Chris Risner :-) to put a simple iOS client together. That was all the inspiration required to get it working with MonoTouch.

Actually there is already a MonoTouch todo-list example called Tasky and it has previously been adapted to use Apple's iCloud storage.

The finished code for TaskyAzure borrows heavily from the existing Tasky samples (eg. it uses MonoTouch.Dialog), and really only borrows the REST API urls and Json from Chris' post. I might be biased, but the C# code looks a lot simpler to me :-)
Visit github for the TaskyAzure code. The app looks like this:

And just to prove that the Windows 8 app and the MonoTouch app are both writing to the same Azure database, here is a screenshot of the Azure Management Portal showing the data storage:
Azure Mobile Services looks pretty interesting - look forward to seeing the official cross-platform APIs :-)

UPDATE: to try the code follow the Microsoft's instructions, including creating a free trial account. Once your Azure Mobile Service has been created, configure the app by updating the constants in the AzureWebService.cs class:

static string subdomain = "xxxxxx"; // your azure subdomain
static string MobileServiceAppId = "xxxxxx"; // your application key

Thursday, 23 August 2012

In-app purchase vulnerability & MonoTouch

Earlier this year (around July) Apple announced that a vulnerability had been discovered in the in-app purchasing mechanism, which they discuss here. They provide some Objective-C code which:

  • Checks the information returned matches the information in the SKPayment
  • Checks that new transactions have a unique transaction ID
  • Verifies the SSL certificate
  • Verifies the receipt's signature

I've started a port of that code to MonoTouch, so far it only performs the first two mitigation steps. The VerificationController c# class is a gist.

Adding this code to a simple in-app purchase implementation would turn something like this:

into something like this:

where there is now an additional web request round-trip in your purchase code, plus a pile of comparisons to see whether the the StoreKit receipt matches the one you requested from iTunes directly. It also stores a list of every transaction ID in NSUserDefaults that is used to identify duplicates (which is an indication that the responses are being faked).

WARNING: the c# port currently only performs rudimentary checks comparing the receipt returned by StoreKit to one you've attempted to independently verify with iTunes. Without the SSL certificate and signature checks your code will still be vulnerable to sophisticated hacks on the DNS config to re-route requests and fake the responses. Please consider this a starting point for improving the security of your in-app purchase code.

NOTE: Apple says this vulnerability will be addressed in a future version of the operating system!

Friday, 17 August 2012

Image Metadata with MonoTouch

Developers frequently want to know how to extract metadata from an image file on iOS using MonoTouch. One alternative is to use MonoTouch.ImageIO.CGImageSource to query the image (without even having to load it into memory).

Here is an example on gist that shows how to use the CGImageSource class, and a screenshot of how it looks (you'll have to add your own image to the project):

The key lines of code are:

var imageFilename = "img.jpg";
var url = new NSUrl(imageFilename, false);
CGImageSource myImageSource;
myImageSource = CGImageSource.FromUrl (url, null);
var ns = new NSDictionary();
var imageProperties = myImageSource.CopyProperties(ns, 0);
// Output ALL teh things
//Console.WriteLine(imageProperties.DescriptionInStringsFileFormat);

// Basic Properties
var width = imageProperties[CGImageProperties.PixelWidth];
var height = imageProperties[CGImageProperties.PixelHeight];
var orientation = imageProperties[CGImageProperties.Orientation];
var dimensions = String.Format ("Dimensions: {0}x{1} (orientation {2})", width, height, orientation);
Console.WriteLine(dimensions); 

// TIFF Properties
var tiff = imageProperties.ObjectForKey(CGImageProperties.TIFFDictionary) as NSDictionary;
var make = tiff[CGImageProperties.TIFFMake];
var model = tiff[CGImageProperties.TIFFModel];
var dt = tiff[CGImageProperties.TIFFDateTime];
var tprops = String.Format ("TIFF: {0} {1} {2}", make, model, dt);
Console.WriteLine(tprops); 

// GPS Properties
var gps = imageProperties.ObjectForKey(CGImageProperties.GPSDictionary) as NSDictionary;
var lat = gps[CGImageProperties.GPSLatitude];
var latref = gps[CGImageProperties.GPSLatitudeRef];
var lon = gps[CGImageProperties.GPSLongitude];
var lonref = gps[CGImageProperties.GPSLongitudeRef];
var loc = String.Format ("GPS: {0} {1}, {2} {3}", lat, latref, lon, lonref);
Console.WriteLine(loc); 

// EXIF Properties
var exif = imageProperties.ObjectForKey(CGImageProperties.ExifDictionary) as NSDictionary;
var fn = exif[CGImageProperties.ExifFNumber];
var focal = exif[CGImageProperties.ExifFocalLength];
var eprops = String.Format ("EXIF: Fstop {0} FocalLength {1}", fn, focal);
Console.WriteLine(eprops); 
Xamarin already has a recipe explaining how to save a photo with metadata.

Sunday, 1 April 2012

CoreImage with MonoTouch (example)

In response to a question on the mailing list over the weekend I put together a quick example of using CoreImage in MonoTouch to adjust the Contrast, Saturation and Brightness of an image. It looks like this:
CoreImage with MonoTouch
The code is available in a gist; to use simply create a new MonoTouch Empty iPhone Project and paste in the code/create the files.
It initially uses a supplied image but you can take a photo with the camera and manipulate that instead. NOTE that when you take a camera image, a 'display copy' is made (scaled down to screen resolution) and the Contrast/Saturation/Brightness changes you make are applied to the scaled-down copy to ensure the UI is responsive and avoid memory issues. If you choose to save the image, the C/S/B values are re-applied to the original image before being saved, so you get an 'original resolution' verison saved to the Camera Roll.

There is also a CoreImage project on Xamarin's github which includes examples of many more CIFilters (see also Apple's docs). Plus there's a Sepia-tone example in the MonoTouch iOS5 doc.

FYI using CIFilters with MonoTouch is very simple as this method shows:
// the CoreImage filter  
CIColorControls colorCtrls;
// apply to an image
UIImage AdjustImage (UIImage image) {
   if (colorCtrls == null)
      colorCtrls = new CIColorControls () {
         Image = CIImage.FromCGImage (image.CGImage),
         Brightness = sliderB.Value, 
         Saturation = sliderS.Value, 
         Contrast = sliderC.Value
      };
   else {
      colorCtrls.Brightness = sliderB.Value; 
      colorCtrls.Saturation = sliderS.Value; 
      colorCtrls.Contrast = sliderC.Value;
      colorCtrls.Image = CIImage.FromCGImage(image.CGImage);
   }
   var output = colorCtrls.OutputImage;
   var context = CIContext.FromOptions (null);
   var result = context.CreateCGImage (output, output.Extent);
   colorCtrls = null;
   return UIImage.FromImage(result);
}

Sunday, 4 March 2012

iCloud UIDocument sample: taskcloud

One of iOS5's biggest new features was iCloud storage - the ability for apps to store data (files) "in the cloud" and access them from multiple devices, with OS-supported server-storage/upload, synchronization and backup.
Although it is possible to access "iCloud" functionality directly from within your code, Apple recommends using the new UIDocument class which has a lot of 'built-in' functionality to help manage iCloud documents. At its most basic, you only need to subclass UIDocument and override two methods (LoadFromContents & ContentsForType) to get it working.

The TaskCloud sample creates a TaskDocument subclass and contains some additional code to retrieve a document list from iCloud. The example is a little contrived - using a separate 'file' for each task might not be the best way to model a to-do list application - but you get the idea: individual tasks are created as files and iCloud synchronizes them across all your devices!
The code is still "under construction" so please forgive any dodgy practices. It also doesn't address the full iCloud API, such as conflict resolution or moving files to/from 'local' storage.

You can download the (MonoTouch) code from Github.

As a reminder, here is the guide for configuring your MonoTouch project for iCloud.


(see also, the iCloud Key-Value storage example)

Wednesday, 29 February 2012

iCloud Key-Value example: chat2self

Apple introduced a new API in iOS5 - iCloud Key-Value Data Storage - which lets your applications share a collection of key-value data between devices (with the same App Store login). It's fairly restricted (limited number of keys, limited data size, and no guaranteed time to sync), but it's also very easy to use.

Because the storage is only shared with the same user, it's pretty useless for a chat program. On the other hand, I was keen to play with Miguel's latest BubbleCell example. The result: a simple chat program that only sends messages between your iCloud-registered devices. Each device uses a single 'key' to save the last message you wrote on that device, and iCloud takes care of sync'ing that out to your other devices. When they receive the sync'd data, a notification kicks in and it appears in the conversation! It's definitely half-duplex...


Grab the (MonoTouch) code from Github. Remember: you'd never actually build a chat-service with iOS5 iCloud Key-Value Data Storage, this is just for fun :-)

UPDATE: some handy tips for setting up iCloud for MonoTouch development.