Showing posts with label xamarin. Show all posts

Saturday, 14 May 2016

Xamarin.Forms Workbooks

As explained in the last post, it's easy to add Nuget packages to Xamarin Workbooks. My immediate reaction to this news was "I want to use Xamarin.Forms!" Unfortunately it's not immediately obvious how to get Xamarin.Forms into a Workbook... so here are the steps (for an iOS Workbook):

1. Add the Xamarin.Forms nuget (and reference the platform)

When you add the Xamarin.Forms Nuget, four assemblies will be referenced (including the iOS Platform assembly for Xamarin.Forms). The using statements need to be added too - don't forget to add the Xamarin.Forms.Platform.iOS namespace:


2. Create a Page and App as usual

In both classes it's a good idea to create public properties for elements you want to manipulate in the workbook.

This allows those controls to be referenced later in the workbook...

3. Hack the FormsAppDelegate

The biggest hurdle to getting Xamarin.Forms to run is that in a normal iOS app, the AppDelegate must be a subclass of FormsApplicationDelegate to wire up various bits of Xamarin.Forms. Peeking into the open-source, the key thing we need to do is set the RootViewController... the following code does the initialization we need to get a Workbook running:


WARNING: obviously this approach misses some of the other code implemented in FormsApplicationDelegate so some things might not work as expected. This is a bit of a hack :)

4. Run It

The public properties on the App and Page classes mean the workbook can manipulate those elements to demonstrate various Xamarin.Forms capabilities.


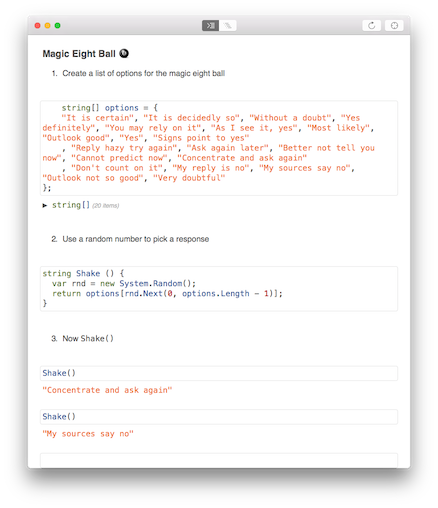
Try it out with the WorkbookFormsTest workbook:


Check out the more complex ListView1 workbook too:


p.s. the irony of included screenshots of code is not lost on me - but hey, it's actually a good reason to download and us Xamarin Workbooks to try these samples out :D

Xamarin Workbooks with Nugets

Xamarin Workbooks are getting better and better (check out the intro to Workbooks if you don't know what I'm talking about).

Nuget packages can now be added, meaning you can teach or demo almost anything in a Workbook :)

In the Workbook app, choose File > Add Package... to open the Nuget package explorer:


Then search for the Nuget and add to the workbook:


Try out this Json.NET Workbook example to see how it works


Coming up next - adding the Xamarin.Forms nuget!

p.s. for a video demo of Nugets in Workbooks, check out this community contribution on brax.tv

Monday, 25 April 2016

Xamarin Evolve 5k

Update: thanks everyone who ran!


There's been a tradition for the more energetic attendees to do a morning 5k run during Xamarin Evolve - and 2016 will be no different! Xamarins have been out training most mornings, and we look forward to meeting and running with our customers. It's a FUN run, not a race - if you've got your gear and can complete the distance, please join us! Follow @conceptdev for twitter updates.

Date: Wednesday 27th (first day of conference, before the keynote)
Time: 6:15am
Place: outside Hyatt reception (near the flagpoles)

The Course

We'll run a flat 5km (3.2 mile) loop anti-clockwise around the conference center and surrounds:


It'll be early morning so traffic should be light (based on the past few days), however there are a couple of road crossings and safety will be the priority over speed. This is what the meeting place looks like at 6:15am:


For the speedsters, hang around at the end if possible to celebrate with everyone, get a group photo, and ensure you get mini-hack credit for completing the run!


Monday, 4 April 2016

Introducing Xamarin Workbooks

The first public demonstration of Xamarin's new Workbooks idea was Miguel de Icaza's //build 2016 talk "Mobile First" (although he first wrote about it back in February). In his talk, Miguel demonstrates a new take on interactive documentation in which a Markdown-formatted file can live-execute C# code-fenced blocks; not just in-line but also in an iOS or Android simulator.


This opens up a great opportunity to write and share interactive documentation that not only describes an API or feature, but shows it in action. Further, it's easy to write, being based on the well-known Markdown format.

Give it a try!

You can now try Workbooks for yourself! The editor can be downloaded here, and there is some Workbook documentation on the Xamarin developer portal.

I've thrown together a few very simple ideas on github:

See Miguel's talk (if you didn't already) for a really cool demo.

Some Notes


  1. They're written in Markdown, but with a .workbook file extension.
  2. Each file begins with a small JSON-formatted metadata section. The editor will add this for you.
  3. C# code inside triple-backtick code fences will be executed when the file is viewed in the Workbooks editor. 
There's sure to be other resources popping up now that the project preview is publicly available -- Ben Bishop's video is the first community resource I've seen. Can't wait to see what everyone creates with it!

Tuesday, 29 September 2015

iOS 9-ify your Xamarin.Forms App

It's not just regular Xamarin.iOS apps that can implement fancy iOS 9 features :) Check out the quick hacks I did to this Restaurant Guide Xamarin.Forms sample to add iOS 9 features:


Mostly using the magic of Dependency Service I added:


No special work was required to get the app running with iPad Multitasking, other than to ensure there was a Storyboard (or XIB) Launchscreen.


Finally, I added the Application Transport Security "opt-out" tags to the Info.plist file, so that the links to all the different restaurants would work in the WebView control.

Download the code from github to try for yourself!

p.s. Ignore the fact that this sample uses Razor templates to generate the restaurant detail view. That is merely a coincidence - this existing Xamarin.Forms sample was the most appropriate to add iOS 9 features to. iOS 9 features can be added to any Xamarin.Forms app, whether it displays data with XAML, C#, or in a Razor HTML template ;)

Sunday, 27 September 2015

iOS 9-ify your Xamarin App

With the iPhone 6s models now available, it's possible to build and test all the great new features of iOS 9 with Xamarin. To demonstrate, I've tried to squeeze as many iOS 9 features as possible into one sample: To9o app (that's "Todo" but with a "9" :-) The c# code is on github and screenshots of each iOS 9 feature are shown below.

3D Touch

3D Touch can used a few different ways, but requires an iPhone 6s to test (the Simulator doesn't support 3D Touch). I started by adding these two:

Multitasking for iPad

If the app can resize its UI appropriately, it should work fine for multi-tasking!

ContactsUI

The "Todo" app doesn't traditionally need an interface to the Contacts list, but I added it just to give this new API a try :)

New Search APIs

The new search APIs let you expose content to search and Siri. I've added both:
Notice the Back to Search button in the navigation bar.

UIStackView

This new layout option makes it much easier to build screens that 'scale', and also makes it even easier to support RTL languages (see below).
* Note: currently UIStackViews must be drawn using Xamarin's Xcode integration, but the built-in Xamarin iOS Designer will support them soon!

Collection View Changes

The main Todo list is a UICollectionView rather than a table, so it can demonstrate how easy it now is to re-order items with two simple methods added in code.

Right-to-Left Language Support

The entire app can now automatically flip (including UINavigationController animations) when displaying RTL languages like Arabic and Hebrew (note: machine translation used for example, apologies for any inaccuracies).

SFSafariViewController

This new API makes it easy to implement an in-app web browsing experience with a line or two of code. I've used it just for an "About" window.


All these improvements are explained in Xamarin's iOS 9 docs, and the code is available to review. It is still a work-in-progress so check back for more updates. 

Wednesday, 18 March 2015

Microsoft Band SDK + Xamarin

Band-fans were happy to see Microsoft release their Java Android SDK for Microsoft Band a few weeks ago, and their Objective-C iOS SDK this week. Xamarin was then able to almost immediately release the Microsoft Band SDK component for iOS and Android, giving you the same functionality but entirely in C# for all three mobile platforms...

I decided to give it a try, converting my "magic eight ball" apps for Xamarin.Forms and Apple Watch to the Band. The idea is: you shake your wrist and the "prediction" appears on the Band!


It works because there is an Android app running on the paired phone, using the Band SDK. The app is tracking the Band's accelerometer, and using the readings to decide when you've shaken your wrist a couple of times.

When the shake-detection is triggered, the app picks a random number, pushes a new Tile onto the Band (if it doesn't already exist), and then sends a message for the tile with a random "prediction".

The Android app is simple, it contains only a Connect button to connect to the Band, and a Vibrate button to test the connection (plus a label that displays the "prediction" text that is sent to the Band).


The code for this Android sample is available on github, hopefully I'll get the iOS version running soon.

If you want to get more info about developing for the Band, check out Matt's detailed blogpost with code.


Finally, Microsoft built a quite detailed Android app that demonstrates all aspects of their SDK, and Matt did an amazing job of porting it to Xamarin - check that out too!


Saturday, 21 February 2015

Apple Watch Kit round-up

It's Saturday, a good excuse for a 'fun' post. Here's a little collection of tidbits about the Apple Watch...


Apple: Watch Kit - if you're thinking of developing for the platform, might as well start at the source :)

Wareable: The best Apple Watch apps... - some great screenshots of apps already being built, including Clear, BMW, and Nike. It's interesting to see the UI design approach being taken by different developers. Check out the similar list on ibtimes.com

WatchAware: Watch Apps - great catalog of watch app demos.

FastCompany: How the Apple Watch will work... - a couple of thoughts on app design, and screenshots of Todoist.

eleks labs' unofficial Tesla app - more design thoughts and prototype video (unofficial development, not affiliated with Tesla)..

Daring Fireball: On the Pricing of the Apple Watch - so yeah, "starting at $349" sounds like it's going to be the understatement of the year.

WatchKit FAQ - awesome collection of questions and answers (and cute watch drawings too).

MartianCraft: Designing for the Apple Watch with Briefs - even if you don't use the tool (which looks great) this is a lovely post on Watch app design.

Five Minute Watch Kit - good collection of blog posts.

If that's got you interested in building apps for the Apple Watch, it's time to check out Xamarin's Watch Kit Preview and how to get started (inc video) and my first watch app.


I've also got a couple of samples, including Magic 8 Ball, Calculator, Insta, and Todo for you to try.

^ watch frame screenshots generated with Bezel thanks to the fine folks at infinitapps.

Tuesday, 20 January 2015

Apple Watch Kit programming with C# (and Xamarin)

For my "Your First Xamarin.Forms App" talk at Evolve this year I built a very simple version of the classic "Magic Eight Ball" fortune-telling app. Seemed like a perfect example to adapt for my First Apple Watch App. It's built in C# using Xamarin (of course); Xamarin's Watch Kit Preview came out today!

Here is the finished app: a simple display that answers any question you ask ;-) Force Touch on the screen to pop-up the menu to ask another question (Shake), or simply say "Thanks". Grab the code from Github.
^ watch frame screenshots generated with Bezel thanks to the fine folks at infinitapps.

Apple Watch Projects

The solution structure for watch apps consists of three projects (notice that watch apps are split in two parts):
  • an iPhone app which delivers the watch app to the user (and is also obviously a regular iPhone app),
  • an Watch Kit Extension where the code for the watch app runs (on the iPhone, but separate to the iPhone app),
  • a Watch app which is only the storyboard and image resources that go to the watch itself.

Storyboard User Interface

After creating the three projects in a new solution, the first step is to draw the user interface in Interface Builder. Right-click on the Interface.storyboard (already in the template) and open in Xcode.

I did the following:
  • gave the interface controller a Title: 8Ball
  • dragged a Label and centered it
  • Ctrl + dragged an outlet from the label into the header file called result
  • dragged a Menu onto the scene (this is triggered by Force Touch)
  • added and named the two MenuItems: Shake & Back
  • Ctrl + dragged an action from the first menu item called shake
Remember: the storyboard (and any image resources) are the the only things that get installed on the watch itself.

WatchKit C# Code

With the user interface defined in the storyboard, I just needed to wire-up the outlet and action I created in C# to make the app work. The C# code will run in the Watch Kit Extension - on the iPhone itself, not on the CPU of the watch.

First I copied the Magic Eight Ball responses from my Xamarin.Forms app (it's a simple string array, called options) and then I started to implement methods in the InterfaceController.

The Awake method is called when the scene is created, so this is where the code selects its first random response to show the user. I store it in a local variable lastResult and also in NSUserDefaults (for the Glance, explained later).

public override void Awake (NSObject context)
{
 base.Awake (context);
 var rnd = new System.Random();
 lastResult = options[rnd.Next(0, options.Length - 1)]; 
 NSUserDefaults.StandardUserDefaults.SetString 
  (lastResult, "lastResult");
}

Then in WillActivate I set the label's text to the random value:

public override void WillActivate ()
{
 result.SetText (lastResult);
}
Finally, the menu's Shake button should choose a new random response, so the action is implemented to generate new new answer, set the local lastResult variable, the NSUserDefault, and also the label's text.

partial void shake () {
 var rnd = new System.Random();
 lastResult = options[rnd.Next(0, options.Length - 1)]; 
 result.SetText (lastResult);
 NSUserDefaults.StandardUserDefaults.SetString 
  (lastResult, "lastResult");
}

That's all the code required to get the app running! I did a couple more things, however, to demonstrate how to programmatically modify the Menu...

In the Awake method I add another menu item called Thanks:

AddMenuItem (WKMenuItemIcon.Accept, "Thanks", new ObjCRuntime.Selector ("tapped"));
The Selector is implemented as shown - notice the [Export] is required:
[Export("tapped")]
void MenuItemTapped () {
 result.SetText ("You're welcome!");
}

Glance Mode

I also implemented Glance mode, which simply displays the last response generated by the app.

The watch app template already includes a GlanceInterfaceController so I just had to drag a couple of Labels onto it, and Ctrl + drag an outlet for one, so I could change the text programmatically.


Because I always store a generated result in NSUserDefaults the GlanceInterfaceController, the code for the glance is really simple:
var r = NSUserDefaults.StandardUserDefaults.StringForKey("lastResult");
lastResult.SetText (r);


Currently you cannot test Glances from within Xamarin Studio, but it's easy to trigger it using Terminal and the following command (make sure you update path to match your app):

/Library/Frameworks/Xamarin.iOS.framework/Versions/Current/bin/mtouch --sdkroot=/Applications/Xcode-Beta.app/Contents/Developer/ --device=:v2:runtime=com.apple.CoreSimulator.SimRuntime.iOS-8-2,devicetype=com.apple.CoreSimulator.SimDeviceType.iPhone-6 --launchsimwatch=/Users/craigdunn/Projects/Watch8Ball/Watch8Ball/bin/iPhoneSimulator/Debug/Watch8Ball.app --watchlaunchmode=Glance

The finished glance display looks like this:

And that's it! Around 10 lines of C# code to build an Apple Watch app.

Download the Xamarin Watch Kit Preview, get the code from Github and try it for yourself!

Tuesday, 30 September 2014

iPhone 6 and 6 Plus LaunchScreen.storyboard for Xamarin

Following on from the previous post about adding launch images for iPhone 6 and 6 Plus, here are the instructions for adding a LaunchScreen.storyboard file instead of multiple fixed-size images. Apple's documentation recommends this method over using the static images. I used these instructions for replacing launch images with storyboards as a reference.

Configuring a LaunchScreen like this will automatically scale up your app for iPhone 6 and iPhone 6 Plus devices. You might also want to consider adding @3x retina images for iPhone 6 Plus support.

1. Add a new Storyboard to your project and call it LaunchScreen.storyboard.

2. Drag a UIViewController in and design your launch screen. I chose a black background with some white centered text - it looks like this (use the VIEW AS option to preview in different sizes):
3. Open the iPhone application Project Options and scroll down to the iPhone Launch Images section. There is a new Launch Screen dropdown (currently in Beta) that will automatically be populated with the available storyboards and xibs in your project. Choose the storyboard you just added.
3a. This creates the following key in your Info.plist (just FYI):
 <key>UILaunchStoryboardName</key>
 <string>LaunchScreen</string>

4. When you build the app, appropriate launch images will be generated for your app. Here's a shot of the emulator starting up showing the launch image for iPhone 6:

I've updated my Xamarin.Forms Todo sample, the code and storyboard are available on github.

UPDATE: Gerry reminded me about Marco's experience where adding a LaunchImage.storyboard file causes iOS to ignore the UIDeviceFamily setting in Info.plist (which specifies iPhone/iPod, iPad, or Universal app) and upscale iPhone-only apps to full iPad screen size (potentially making your app look really weird!). This behavior still appears to occur on the simulator, so test before you launch :)


Monday, 22 September 2014

iPhone 6 and 6 Plus Launch Images for Xamarin

I was initially stumped by how to get my Xamarin.iOS and Xamarin.Forms apps to size correctly on the iPhone 6 and iPhone 6 Plus. Thanks to this StackOverflow question & answer I have a solution - reposting here because the solution that works best for me right now is only the 3rd most popular answer there.

Simply create two new default images (this is for portrait only, but landscape will become obvious later):

Default-667h@2x.png for iPhone 6; dimensions 750x1334

Default-736h@3x.png for iPhone 6 Plus; dimensions 1242x2208

and place them in the application root or the Resources folder. Notice the filename format is similar to the Default-568h@2x.png image that Apple introduced for the iPhone 5 screen.

Now edit the source of your Info.plist file (open in a text editor so you can type XML directly) and add the following UILaunchImages key (the first two items are for iPhone 6, the others are for the older default image configuration):

<key>UILaunchImages</key>
<array>
<dict>
<key>UILaunchImageMinimumOSVersion</key>
<string>8.0</string>
<key>UILaunchImageName</key>
<string>Default-667h</string>
<key>UILaunchImageOrientation</key>
<string>Portrait</string>
<key>UILaunchImageSize</key>
<string>{375, 667}</string>
</dict>
<dict>
<key>UILaunchImageMinimumOSVersion</key>
<string>8.0</string>
<key>UILaunchImageName</key>
<string>Default-736h</string>
<key>UILaunchImageOrientation</key>
<string>Portrait</string>
<key>UILaunchImageSize</key>
<string>{414, 736}</string>
</dict>
<dict>
<key>UILaunchImageMinimumOSVersion</key>
<string>7.0</string>
<key>UILaunchImageName</key>
<string>Default-568h</string>
<key>UILaunchImageOrientation</key>
<string>Portrait</string>
<key>UILaunchImageSize</key>
<string>{320, 568}</string>
</dict>
 <dict>
  <key>UILaunchImageMinimumOSVersion</key>
  <string>6.0</string>
  <key>UILaunchImageName</key>
  <string>Default</string>
  <key>UILaunchImageOrientation</key>
  <string>Portrait</string>
  <key>UILaunchImageSize</key>
  <string>{320, 480}</string>

 </dict>
</array>
If you wish to support landscape images, add matching keys with Default-Landscape-???h filenames and specify the correct orientation and size.

Note that this is not Apple's preferred way of indicating support for the screen sizes. Their Launch Images doc says:

You use a launch XIB or storyboard file to indicate that your app runs on iPhone 6 Plus or iPhone 6.

which requires you to create a Storyboard or XIB using size classes. More on how to do that in this post, or head back to that StackOverflow post!

p.s. this iPhone 6 Screens Demystified post by PaintCode is awesome!

UPDATED: @jamesmontemagno informs me that you need to add the original 320x480 into the plist too, so I've added to the example above. 

Tuesday, 15 January 2013

Xamarin for Java Developers

Last night I was given the opportunity to present Xamarin's Mono for Android to the East Bay Google Developer Group. It was a lot of fun, with plenty of the audience asking a lot of great questions and generally being curious about how C# can be used to build Android apps. Here are the slides from the talk - please drop me a line with any feedback or questions!

One topical question was "what does using Xamarin and C# offer existing Android Java developers?". I have a couple of thoughts which are listed below (in no particular order):

Learn a new language!
The days of specializing in a single language throughout your career (or even throughout the year!) are over. Once upon a time it was COBOL all the way down, and you could argue that it's still enough to just know C/C++. But it's no longer the norm ~ developers want to grow and learn, and use the best tool for the job (whether it's Perl, PHP, Java, Ruby, C#, F#, Javascript, TypeScript, Go, or whatever).

It can be daunting though, to start from scratch and learn a new IDE, framework and syntax - which is why I think C# is a great progression for Java devs. The two languages are obviously related - there is a lot of common syntax and equivalent keywords that make it easy to get proficient quickly. They're both strongly typed, so the IDE and compiler can really help you learn. Then once you know the C# basics, a whole world of new APIs open up to you: LINQ, the .NET framework's serialization and web service features, Parallel Task Library and async support, reactive extensions, and more.

It also introduces you to another IDE (Visual Studio is a great tool, as is Xamarin's free MonoDevelop IDE), which in turn can encourage you to further explore other languages and platforms (suddenly it's a small leap to work on Windows Phone, or try F#). Using the free trial you can easily get productive in C# and Android development without any up-front cost: you can run your apps on the Android emulator, and choose to work on either Windows or Mac with MonoDevelop.

Cross-platform development!
There are a lot of Java developers who are already proficient with the Android SDK and have published successful apps to Google Play, or Amazon, or Samsung app stores; and there's another group of corporate/enterprise developers building apps for internal/extranet use that were designed for Android. When these developers ask "why Xamarin?", I never say "throw away everything you've done and re-write in C#!" -- that'd be crazy ;-)

But what happens when you want to take these apps cross-platform, either to make more money on the iOS and Mac App Stores or to better support a corporate BYOD policy which means your internal apps need to run on iOS and Windows? You can choose to learn Objective-C to write for iOS and C# for Windows... or take the opportunity provided by Xamarin to use C# for all the non-Java platforms and reduce the amount of code you have to support and re-write by half!

Following on from the first point, I think learning C# is a much smaller leap for a Java developer than Objective-C; and once you've done so you can work on either iOS apps using Xamarin's MonoTouch or Windows Phone, Windows 8 and Windows RT tablet apps! You might like C# so much that you do go back and re-write your Java, or at least start building a hybrid that shares some Java and C# code...

Xamarin does Android well too :)
If Java developers do fall in love with C# then they also find that Xamarin does Android just as well as anyone (probably better!). Our MonoDevelop IDE (and our integration with Visual Studio) means you get an awesome coding experience (autocomplete/intellisense/code completion, debugging, refactoring, source control integration, etc) as well as a drag-and-drop UI designer. You be the judge of whether it's a better experience than Eclipse :)

Fin
In summary, why not? As a Java developer you have a lot to gain and nothing to lose by giving C# a try. A whole world of new platforms, tools and frameworks become available with a very low barrier to entry. Try it - you just might like it ;-)

Thursday, 3 January 2013

Localizing iOS6 Storyboards with MonoTouch

Localization and internationalization of XIB and Storyboard files has historically been a very manual process. Typically these file types would be duplicated in each 'language directory' (*.lproj) and then the text and layout tweaked independently by each translator. Changes to the actual Storyboard or XIBs would need to be manually propagated across all the 'language copies'.

In iOS6 Apple introduced a new concept - Base Localization - which you can read about in their documentation on Internationalizing Your App. Your project can contain a 'special' Base.lproj directory where the Storyboard files are located, and then a corresponding *.strings file (whose filename matches the Storyboard's) in each language directory with the translations.

There is a small sample showing how this works with MonoTouch - TaskyL10nStoryboard on github. There is no IDE support currently, but you can easily create the Base.lproj directory manually in MonoDevelop and everything works as expected. Here's a screenshot of the project structure:

then inside the Storyboard itself you need to identify the controls you wish to localize. Click on a control to discover its Object ID, and shown in this screenshot:

Using the Object IDs from the Storyboard file, we can translate the display values for various properties (including text, placeholders and others) in the MainStoryboard.strings file in each language directory, like this:
"SXg-TT-IwM.placeholder" = "nombre de la tarea";
"Pqa-aa-ury.placeholder"= "otra información de tarea";
"zwR-D9-hM1.text" = "Detalles de la tarea";
"bAM-2j-Rzw.text" = "Notas";
"NF3-h8-xmR.text" = "Completo";
"MWt-Ya-pMf.normalTitle" = "Guardar";
"IGr-pR-05L.normalTitle" = "Eliminar";
Using the Object ID and property as the localization key is quite different to Apple's previous guidance on localization, where the key is typically the base-language's actual displayable value.

Here's the localized Storyboard, in Japanese:


What about layout?
Strings can often be very different lengths in different languages. When you used a different Storyboard or XIB for each language then the control sizes could be manually adjusted to fit. When using Base Localization you should use Apple's new constraint-based layout to handle these size differences.

What about iOS5 and earlier?
This method only works on iOS6. To localize text on earlier versions of iOS you will have to duplicate your Storyboards and XIBs for each language, or create outlets for all the controls and set their localized text values in code using NSBundle.MainBundle.LocalizedString().
There is another localized sample - TaskyL10n - which shows how to localize text elements directly and uses MonoTouch.Dialog.

Sunday, 23 September 2012

iOS 6 UIRefreshControl with MonoTouch

Another cute little new feature of iOS 6 is the built-in pull-to-refresh control - UIRefreshControl. It is really simple to wire up with Xamarin on a regular UITableViewController or with MonoTouch.Dialog.

In case you're unfamiliar with it, this is how the new control looks:

To implement:

  • Assign the RefreshControl property of a UITableViewController to a new instance of the control, eg. RefreshControl = new UIRefreshControl();
  • Create a handler for the control's ValueChanged event, eg RefreshControl.ValueChanged += HandleValueChanged;. In this handler your code will do whatever is required to refresh the data when the user pulls down enough to trigger the event.
  • In HandleValueChanged code, once you have refreshed the table, call the EndRefreshing method of the control to stop it spinning. Your refresh code was probably not running on the main thread, in which case you'll probably want to use InvokeOnMainThread like this: InvokeOnMainThread (() => {RefreshControl.EndRefreshing (); });

There are additional features you may use:

  • BeginRefreshing - call this method from your code if you start a refresh operation from code (eg. on a timer or in response to some other event). This sets the UI of the control to indicate there is already a refresh in progress.
  • Refreshing - whether there is already a refresh in progress.
  • AttributedTitle - optional text that appears under the refresh control.
  • TintColor - customize the appearance of the control to match your application's theme.

Refer to Apple's UIRefreshControl doc for additional info.

UPDATE: What about iOS 5?

This above example will not work on earlier versions of iOS - the UIRefreshControl class does not exist, nor does the RefreshControl property on UITableViewController. To get around this problem, the following code does a system check and falls back to an old-fashioned navbarbutton in earlier versions of iOS:

if (UIDevice.CurrentDevice.CheckSystemVersion (6,0)) {
    // UIRefreshControl iOS6
    RefreshControl = new UIRefreshControl();
    RefreshControl.ValueChanged += (sender, e) => { Refresh(); };
} else {
    // old style refresh button
    NavigationItem.SetRightBarButtonItem (new UIBarButtonItem (UIBarButtonSystemItem.Refresh), false);
    NavigationItem.RightBarButtonItem.Clicked += (sender, e) => { Refresh(); };
}

The Refresh method should contain the code that actually gets new data and updates the UITableView. That method should contain a similar if (CheckSystemVersion(6,0)) clause that wraps the call to the RefreshControl.EndRefreshing method on the main thread. Users on older operating systems will see this:

Wednesday, 19 September 2012

iOS 6 released, supported by Xamarin

It would be hard to miss the news that Apple is launching their new iPhone 5 this week, and has also released the final version of iOS 6. What's also great is that Xamarin supports iOS 6 too, on release day! There's already plenty of documentation, using C# with StoreKit, PassKit, EventKit, UIKit changes and more.

Of course there are heaps of little additions as well as those big ones, including a raft of new Core Image Filters to play with. For those working on the next Instagram (isn't everyone ;-), here's a preview of a couple of them:


(Posterize, Bloom, Invert, Perspective and Vortex)

For more information, review the Introduction to CoreImage in iOS 5 and the additional sample code for iOS 6. You might also like Apple's CoreImage Filter Reference.