Showing posts with label ios. Show all posts

Saturday, 14 May 2016

Xamarin.Forms Workbooks

As explained in the last post, it's easy to add Nuget packages to Xamarin Workbooks. My immediate reaction to this news was "I want to use Xamarin.Forms!" Unfortunately it's not immediately obvious how to get Xamarin.Forms into a Workbook... so here are the steps (for an iOS Workbook):

1. Add the Xamarin.Forms nuget (and reference the platform)

When you add the Xamarin.Forms Nuget, four assemblies will be referenced (including the iOS Platform assembly for Xamarin.Forms). The using statements need to be added too - don't forget to add the Xamarin.Forms.Platform.iOS namespace:


2. Create a Page and App as usual

In both classes it's a good idea to create public properties for elements you want to manipulate in the workbook.

This allows those controls to be referenced later in the workbook...

3. Hack the FormsAppDelegate

The biggest hurdle to getting Xamarin.Forms to run is that in a normal iOS app, the AppDelegate must be a subclass of FormsApplicationDelegate to wire up various bits of Xamarin.Forms. Peeking into the open-source, the key thing we need to do is set the RootViewController... the following code does the initialization we need to get a Workbook running:


WARNING: obviously this approach misses some of the other code implemented in FormsApplicationDelegate so some things might not work as expected. This is a bit of a hack :)

4. Run It

The public properties on the App and Page classes mean the workbook can manipulate those elements to demonstrate various Xamarin.Forms capabilities.


Try it out with the WorkbookFormsTest workbook:


Check out the more complex ListView1 workbook too:


p.s. the irony of included screenshots of code is not lost on me - but hey, it's actually a good reason to download and us Xamarin Workbooks to try these samples out :D

Saturday, 21 February 2015

Apple Watch Kit round-up

It's Saturday, a good excuse for a 'fun' post. Here's a little collection of tidbits about the Apple Watch...


Apple: Watch Kit - if you're thinking of developing for the platform, might as well start at the source :)

Wareable: The best Apple Watch apps... - some great screenshots of apps already being built, including Clear, BMW, and Nike. It's interesting to see the UI design approach being taken by different developers. Check out the similar list on ibtimes.com

WatchAware: Watch Apps - great catalog of watch app demos.

FastCompany: How the Apple Watch will work... - a couple of thoughts on app design, and screenshots of Todoist.

eleks labs' unofficial Tesla app - more design thoughts and prototype video (unofficial development, not affiliated with Tesla)..

Daring Fireball: On the Pricing of the Apple Watch - so yeah, "starting at $349" sounds like it's going to be the understatement of the year.

WatchKit FAQ - awesome collection of questions and answers (and cute watch drawings too).

MartianCraft: Designing for the Apple Watch with Briefs - even if you don't use the tool (which looks great) this is a lovely post on Watch app design.

Five Minute Watch Kit - good collection of blog posts.

If that's got you interested in building apps for the Apple Watch, it's time to check out Xamarin's Watch Kit Preview and how to get started (inc video) and my first watch app.


I've also got a couple of samples, including Magic 8 Ball, Calculator, Insta, and Todo for you to try.

^ watch frame screenshots generated with Bezel thanks to the fine folks at infinitapps.

Tuesday, 30 September 2014

iPhone 6 and 6 Plus LaunchScreen.storyboard for Xamarin

Following on from the previous post about adding launch images for iPhone 6 and 6 Plus, here are the instructions for adding a LaunchScreen.storyboard file instead of multiple fixed-size images. Apple's documentation recommends this method over using the static images. I used these instructions for replacing launch images with storyboards as a reference.

Configuring a LaunchScreen like this will automatically scale up your app for iPhone 6 and iPhone 6 Plus devices. You might also want to consider adding @3x retina images for iPhone 6 Plus support.

1. Add a new Storyboard to your project and call it LaunchScreen.storyboard.

2. Drag a UIViewController in and design your launch screen. I chose a black background with some white centered text - it looks like this (use the VIEW AS option to preview in different sizes):
3. Open the iPhone application Project Options and scroll down to the iPhone Launch Images section. There is a new Launch Screen dropdown (currently in Beta) that will automatically be populated with the available storyboards and xibs in your project. Choose the storyboard you just added.
3a. This creates the following key in your Info.plist (just FYI):
 <key>UILaunchStoryboardName</key>
 <string>LaunchScreen</string>

4. When you build the app, appropriate launch images will be generated for your app. Here's a shot of the emulator starting up showing the launch image for iPhone 6:

I've updated my Xamarin.Forms Todo sample, the code and storyboard are available on github.

UPDATE: Gerry reminded me about Marco's experience where adding a LaunchImage.storyboard file causes iOS to ignore the UIDeviceFamily setting in Info.plist (which specifies iPhone/iPod, iPad, or Universal app) and upscale iPhone-only apps to full iPad screen size (potentially making your app look really weird!). This behavior still appears to occur on the simulator, so test before you launch :)


Monday, 22 September 2014

iPhone 6 and 6 Plus Launch Images for Xamarin

I was initially stumped by how to get my Xamarin.iOS and Xamarin.Forms apps to size correctly on the iPhone 6 and iPhone 6 Plus. Thanks to this StackOverflow question & answer I have a solution - reposting here because the solution that works best for me right now is only the 3rd most popular answer there.

Simply create two new default images (this is for portrait only, but landscape will become obvious later):

Default-667h@2x.png for iPhone 6; dimensions 750x1334

Default-736h@3x.png for iPhone 6 Plus; dimensions 1242x2208

and place them in the application root or the Resources folder. Notice the filename format is similar to the Default-568h@2x.png image that Apple introduced for the iPhone 5 screen.

Now edit the source of your Info.plist file (open in a text editor so you can type XML directly) and add the following UILaunchImages key (the first two items are for iPhone 6, the others are for the older default image configuration):

<key>UILaunchImages</key>
<array>
<dict>
<key>UILaunchImageMinimumOSVersion</key>
<string>8.0</string>
<key>UILaunchImageName</key>
<string>Default-667h</string>
<key>UILaunchImageOrientation</key>
<string>Portrait</string>
<key>UILaunchImageSize</key>
<string>{375, 667}</string>
</dict>
<dict>
<key>UILaunchImageMinimumOSVersion</key>
<string>8.0</string>
<key>UILaunchImageName</key>
<string>Default-736h</string>
<key>UILaunchImageOrientation</key>
<string>Portrait</string>
<key>UILaunchImageSize</key>
<string>{414, 736}</string>
</dict>
<dict>
<key>UILaunchImageMinimumOSVersion</key>
<string>7.0</string>
<key>UILaunchImageName</key>
<string>Default-568h</string>
<key>UILaunchImageOrientation</key>
<string>Portrait</string>
<key>UILaunchImageSize</key>
<string>{320, 568}</string>
</dict>
 <dict>
  <key>UILaunchImageMinimumOSVersion</key>
  <string>6.0</string>
  <key>UILaunchImageName</key>
  <string>Default</string>
  <key>UILaunchImageOrientation</key>
  <string>Portrait</string>
  <key>UILaunchImageSize</key>
  <string>{320, 480}</string>

 </dict>
</array>
If you wish to support landscape images, add matching keys with Default-Landscape-???h filenames and specify the correct orientation and size.

Note that this is not Apple's preferred way of indicating support for the screen sizes. Their Launch Images doc says:

You use a launch XIB or storyboard file to indicate that your app runs on iPhone 6 Plus or iPhone 6.

which requires you to create a Storyboard or XIB using size classes. More on how to do that in this post, or head back to that StackOverflow post!

p.s. this iPhone 6 Screens Demystified post by PaintCode is awesome!

UPDATED: @jamesmontemagno informs me that you need to add the original 320x480 into the plist too, so I've added to the example above. 

Tuesday, 15 January 2013

Xamarin for Java Developers

Last night I was given the opportunity to present Xamarin's Mono for Android to the East Bay Google Developer Group. It was a lot of fun, with plenty of the audience asking a lot of great questions and generally being curious about how C# can be used to build Android apps. Here are the slides from the talk - please drop me a line with any feedback or questions!

One topical question was "what does using Xamarin and C# offer existing Android Java developers?". I have a couple of thoughts which are listed below (in no particular order):

Learn a new language!
The days of specializing in a single language throughout your career (or even throughout the year!) are over. Once upon a time it was COBOL all the way down, and you could argue that it's still enough to just know C/C++. But it's no longer the norm ~ developers want to grow and learn, and use the best tool for the job (whether it's Perl, PHP, Java, Ruby, C#, F#, Javascript, TypeScript, Go, or whatever).

It can be daunting though, to start from scratch and learn a new IDE, framework and syntax - which is why I think C# is a great progression for Java devs. The two languages are obviously related - there is a lot of common syntax and equivalent keywords that make it easy to get proficient quickly. They're both strongly typed, so the IDE and compiler can really help you learn. Then once you know the C# basics, a whole world of new APIs open up to you: LINQ, the .NET framework's serialization and web service features, Parallel Task Library and async support, reactive extensions, and more.

It also introduces you to another IDE (Visual Studio is a great tool, as is Xamarin's free MonoDevelop IDE), which in turn can encourage you to further explore other languages and platforms (suddenly it's a small leap to work on Windows Phone, or try F#). Using the free trial you can easily get productive in C# and Android development without any up-front cost: you can run your apps on the Android emulator, and choose to work on either Windows or Mac with MonoDevelop.

Cross-platform development!
There are a lot of Java developers who are already proficient with the Android SDK and have published successful apps to Google Play, or Amazon, or Samsung app stores; and there's another group of corporate/enterprise developers building apps for internal/extranet use that were designed for Android. When these developers ask "why Xamarin?", I never say "throw away everything you've done and re-write in C#!" -- that'd be crazy ;-)

But what happens when you want to take these apps cross-platform, either to make more money on the iOS and Mac App Stores or to better support a corporate BYOD policy which means your internal apps need to run on iOS and Windows? You can choose to learn Objective-C to write for iOS and C# for Windows... or take the opportunity provided by Xamarin to use C# for all the non-Java platforms and reduce the amount of code you have to support and re-write by half!

Following on from the first point, I think learning C# is a much smaller leap for a Java developer than Objective-C; and once you've done so you can work on either iOS apps using Xamarin's MonoTouch or Windows Phone, Windows 8 and Windows RT tablet apps! You might like C# so much that you do go back and re-write your Java, or at least start building a hybrid that shares some Java and C# code...

Xamarin does Android well too :)
If Java developers do fall in love with C# then they also find that Xamarin does Android just as well as anyone (probably better!). Our MonoDevelop IDE (and our integration with Visual Studio) means you get an awesome coding experience (autocomplete/intellisense/code completion, debugging, refactoring, source control integration, etc) as well as a drag-and-drop UI designer. You be the judge of whether it's a better experience than Eclipse :)

Fin
In summary, why not? As a Java developer you have a lot to gain and nothing to lose by giving C# a try. A whole world of new platforms, tools and frameworks become available with a very low barrier to entry. Try it - you just might like it ;-)

Thursday, 13 September 2012

Microsoft's Azure Mobile Services... and WP7... and Mac

So far, Azure Mobile Services have been added to MonoTouch and Mono for Android (as well as Microsoft's getting started sample for Windows 8).
To complete the 'set', I ported the MonoTouch code to MacOSX using the free, open-source MonoMac AND used @kenegozi's 'unofficial' client to munge Azure Mobile Services into our existing Tasky sample on WP7.

These aren't production-quality implementations, mind you, just a couple of quick hacks to illustrate the beauty and simplicity of having C# and the .NET framework available across all these platforms. Oh, and also show the beauty of Azure Mobile Services :-)
You can grab the code for all of these from TaskCloud/Azure on github. You'll need to sign up for the Azure trial and follow the instructions to set up the Todo list tutorial.
Screenshots
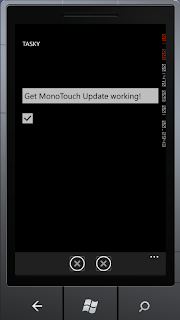
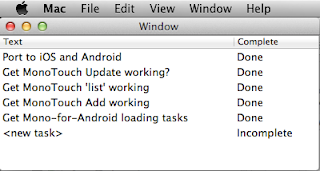
Here's how the WP7 and MonoMac versions look:

Saturday, 1 September 2012

Microsoft's Azure Mobile Services... and Mono-for-Android

Yesterday's post introduced a quick implementation of Microsoft's Azure Mobile Services using MonoTouch to build an iOS app.
The WebClient and Json handling was easily refactored into a single class - AzureWebService - which was then added to the existing Android version of the Tasky sample... and now we have the same Azure Mobile Service being access by three platform clients: Windows 8, iOS and Android all with C# (and the iOS and Android apps sharing the service client code).

Additional features have also been added to AzureWebService to allow deletion of tasks. The Android app source is on github and it looks like this (delete has been added to the iOS app too):

Here is a discussion of how the API was reverse-engineered with Fiddler. The REST endpoints that TaskyAzure accesses are:

GET /tables/TodoItem

GET /tables/TodoItem/?$filter=(id%20eq%20{0})

PATCH /tables/TodoItem/{id}
{"id":1,"text":"updated task text","complete":false}

POST /tables/TodoItem
{"text":"new task text","complete":false}

DELETE /tables/TodoItem/{id}

Finally, only a few small updates were required in the Windows 8 example prevent the completed tasks from disappearing and instead make use of the checkbox in a more natural way:

Now all three apps are reading and writing to the same Azure data store! Can't wait for the official cross-platform APIs :-)

Friday, 31 August 2012

Microsoft's Azure Mobile Services... and MonoTouch

Microsoft only recently announced a cool new addition to the Azure product offering: Mobile Services. They have done a great job at providing a getting started tutorial that gives you a working Windows 8 app in about 5 minutes (seriously, it's fast and easy).

Azure Mobile Services consist of an underlying REST API, so it didn't take long for someone (Chris Risner :-) to put a simple iOS client together. That was all the inspiration required to get it working with MonoTouch.

Actually there is already a MonoTouch todo-list example called Tasky and it has previously been adapted to use Apple's iCloud storage.

The finished code for TaskyAzure borrows heavily from the existing Tasky samples (eg. it uses MonoTouch.Dialog), and really only borrows the REST API urls and Json from Chris' post. I might be biased, but the C# code looks a lot simpler to me :-)
Visit github for the TaskyAzure code. The app looks like this:

And just to prove that the Windows 8 app and the MonoTouch app are both writing to the same Azure database, here is a screenshot of the Azure Management Portal showing the data storage:
Azure Mobile Services looks pretty interesting - look forward to seeing the official cross-platform APIs :-)

UPDATE: to try the code follow the Microsoft's instructions, including creating a free trial account. Once your Azure Mobile Service has been created, configure the app by updating the constants in the AzureWebService.cs class:

static string subdomain = "xxxxxx"; // your azure subdomain
static string MobileServiceAppId = "xxxxxx"; // your application key

Thursday, 23 August 2012

In-app purchase vulnerability & MonoTouch

Earlier this year (around July) Apple announced that a vulnerability had been discovered in the in-app purchasing mechanism, which they discuss here. They provide some Objective-C code which:

  • Checks the information returned matches the information in the SKPayment
  • Checks that new transactions have a unique transaction ID
  • Verifies the SSL certificate
  • Verifies the receipt's signature

I've started a port of that code to MonoTouch, so far it only performs the first two mitigation steps. The VerificationController c# class is a gist.

Adding this code to a simple in-app purchase implementation would turn something like this:

into something like this:

where there is now an additional web request round-trip in your purchase code, plus a pile of comparisons to see whether the the StoreKit receipt matches the one you requested from iTunes directly. It also stores a list of every transaction ID in NSUserDefaults that is used to identify duplicates (which is an indication that the responses are being faked).

WARNING: the c# port currently only performs rudimentary checks comparing the receipt returned by StoreKit to one you've attempted to independently verify with iTunes. Without the SSL certificate and signature checks your code will still be vulnerable to sophisticated hacks on the DNS config to re-route requests and fake the responses. Please consider this a starting point for improving the security of your in-app purchase code.

NOTE: Apple says this vulnerability will be addressed in a future version of the operating system!

Friday, 17 August 2012

Image Metadata with MonoTouch

Developers frequently want to know how to extract metadata from an image file on iOS using MonoTouch. One alternative is to use MonoTouch.ImageIO.CGImageSource to query the image (without even having to load it into memory).

Here is an example on gist that shows how to use the CGImageSource class, and a screenshot of how it looks (you'll have to add your own image to the project):

The key lines of code are:

var imageFilename = "img.jpg";
var url = new NSUrl(imageFilename, false);
CGImageSource myImageSource;
myImageSource = CGImageSource.FromUrl (url, null);
var ns = new NSDictionary();
var imageProperties = myImageSource.CopyProperties(ns, 0);
// Output ALL teh things
//Console.WriteLine(imageProperties.DescriptionInStringsFileFormat);

// Basic Properties
var width = imageProperties[CGImageProperties.PixelWidth];
var height = imageProperties[CGImageProperties.PixelHeight];
var orientation = imageProperties[CGImageProperties.Orientation];
var dimensions = String.Format ("Dimensions: {0}x{1} (orientation {2})", width, height, orientation);
Console.WriteLine(dimensions); 

// TIFF Properties
var tiff = imageProperties.ObjectForKey(CGImageProperties.TIFFDictionary) as NSDictionary;
var make = tiff[CGImageProperties.TIFFMake];
var model = tiff[CGImageProperties.TIFFModel];
var dt = tiff[CGImageProperties.TIFFDateTime];
var tprops = String.Format ("TIFF: {0} {1} {2}", make, model, dt);
Console.WriteLine(tprops); 

// GPS Properties
var gps = imageProperties.ObjectForKey(CGImageProperties.GPSDictionary) as NSDictionary;
var lat = gps[CGImageProperties.GPSLatitude];
var latref = gps[CGImageProperties.GPSLatitudeRef];
var lon = gps[CGImageProperties.GPSLongitude];
var lonref = gps[CGImageProperties.GPSLongitudeRef];
var loc = String.Format ("GPS: {0} {1}, {2} {3}", lat, latref, lon, lonref);
Console.WriteLine(loc); 

// EXIF Properties
var exif = imageProperties.ObjectForKey(CGImageProperties.ExifDictionary) as NSDictionary;
var fn = exif[CGImageProperties.ExifFNumber];
var focal = exif[CGImageProperties.ExifFocalLength];
var eprops = String.Format ("EXIF: Fstop {0} FocalLength {1}", fn, focal);
Console.WriteLine(eprops); 
Xamarin already has a recipe explaining how to save a photo with metadata.

Sunday, 1 April 2012

CoreImage with MonoTouch (example)

In response to a question on the mailing list over the weekend I put together a quick example of using CoreImage in MonoTouch to adjust the Contrast, Saturation and Brightness of an image. It looks like this:
CoreImage with MonoTouch
The code is available in a gist; to use simply create a new MonoTouch Empty iPhone Project and paste in the code/create the files.
It initially uses a supplied image but you can take a photo with the camera and manipulate that instead. NOTE that when you take a camera image, a 'display copy' is made (scaled down to screen resolution) and the Contrast/Saturation/Brightness changes you make are applied to the scaled-down copy to ensure the UI is responsive and avoid memory issues. If you choose to save the image, the C/S/B values are re-applied to the original image before being saved, so you get an 'original resolution' verison saved to the Camera Roll.

There is also a CoreImage project on Xamarin's github which includes examples of many more CIFilters (see also Apple's docs). Plus there's a Sepia-tone example in the MonoTouch iOS5 doc.

FYI using CIFilters with MonoTouch is very simple as this method shows:
// the CoreImage filter  
CIColorControls colorCtrls;
// apply to an image
UIImage AdjustImage (UIImage image) {
   if (colorCtrls == null)
      colorCtrls = new CIColorControls () {
         Image = CIImage.FromCGImage (image.CGImage),
         Brightness = sliderB.Value, 
         Saturation = sliderS.Value, 
         Contrast = sliderC.Value
      };
   else {
      colorCtrls.Brightness = sliderB.Value; 
      colorCtrls.Saturation = sliderS.Value; 
      colorCtrls.Contrast = sliderC.Value;
      colorCtrls.Image = CIImage.FromCGImage(image.CGImage);
   }
   var output = colorCtrls.OutputImage;
   var context = CIContext.FromOptions (null);
   var result = context.CreateCGImage (output, output.Extent);
   colorCtrls = null;
   return UIImage.FromImage(result);
}

Sunday, 4 March 2012

iCloud UIDocument sample: taskcloud

One of iOS5's biggest new features was iCloud storage - the ability for apps to store data (files) "in the cloud" and access them from multiple devices, with OS-supported server-storage/upload, synchronization and backup.
Although it is possible to access "iCloud" functionality directly from within your code, Apple recommends using the new UIDocument class which has a lot of 'built-in' functionality to help manage iCloud documents. At its most basic, you only need to subclass UIDocument and override two methods (LoadFromContents & ContentsForType) to get it working.

The TaskCloud sample creates a TaskDocument subclass and contains some additional code to retrieve a document list from iCloud. The example is a little contrived - using a separate 'file' for each task might not be the best way to model a to-do list application - but you get the idea: individual tasks are created as files and iCloud synchronizes them across all your devices!
The code is still "under construction" so please forgive any dodgy practices. It also doesn't address the full iCloud API, such as conflict resolution or moving files to/from 'local' storage.

You can download the (MonoTouch) code from Github.

As a reminder, here is the guide for configuring your MonoTouch project for iCloud.


(see also, the iCloud Key-Value storage example)

Wednesday, 29 February 2012

iCloud Key-Value example: chat2self

Apple introduced a new API in iOS5 - iCloud Key-Value Data Storage - which lets your applications share a collection of key-value data between devices (with the same App Store login). It's fairly restricted (limited number of keys, limited data size, and no guaranteed time to sync), but it's also very easy to use.

Because the storage is only shared with the same user, it's pretty useless for a chat program. On the other hand, I was keen to play with Miguel's latest BubbleCell example. The result: a simple chat program that only sends messages between your iCloud-registered devices. Each device uses a single 'key' to save the last message you wrote on that device, and iCloud takes care of sync'ing that out to your other devices. When they receive the sync'd data, a notification kicks in and it appears in the conversation! It's definitely half-duplex...


Grab the (MonoTouch) code from Github. Remember: you'd never actually build a chat-service with iOS5 iCloud Key-Value Data Storage, this is just for fun :-)

UPDATE: some handy tips for setting up iCloud for MonoTouch development.